You will need an FTP program to connect to your hosting space for file transfer. There are many free and paid FTP clients you can choose from and all will work in the same way and require much the same settings as used in this tutorial.
FTP Details
Your welcome email has a section titled FTP Login Details which provides all the information you will need to connect to your hosting FTP. Here are some example settings, which would generally be similar to yours in your welcome email (replacing yourdomain.com and jbloggs username):
- Server or Host: ftp.yourdomain.com
- Username: jbloggs@yourdomain.com
- Password: as in the email.
- Port: 21
- Location or Path: /var/www/html/
We recommend smartFTP which is free FTP software you can download from http://www.smartftp.com/. Below is a screenshot of smartFTP showing how you would use this particular FTP software to upload your website:
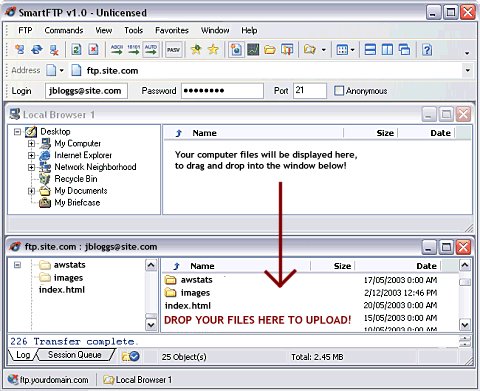
Connecting to FTP for the first time
When you connect to FTP for the first time you should see there is already an “index.html” file, and two folders called “images” and “awstats”. If you can see these files and folders then you are in the correct place to upload your website! You can replace the index.html file and images folder with your own pages.
Do not delete the ‘awstats’ folder as this contains all your websites visitor statistics and information!
Connecting to FTP
Once you have entered the above information into your FTP client you can click connect and it should connect you to your web hosting account.
Once connected it is a simple case of dragging and dropping the files for your website from your computer to your webspace. The FTP client will confirm when the files have uploaded, and you can then view your website online to see that they are in place. Don’t forget to hit Refresh in your browser to see the new version of a file you’ve uploaded.